ImageJ basics
Have you ever wanted to quantify something from an image? For example:
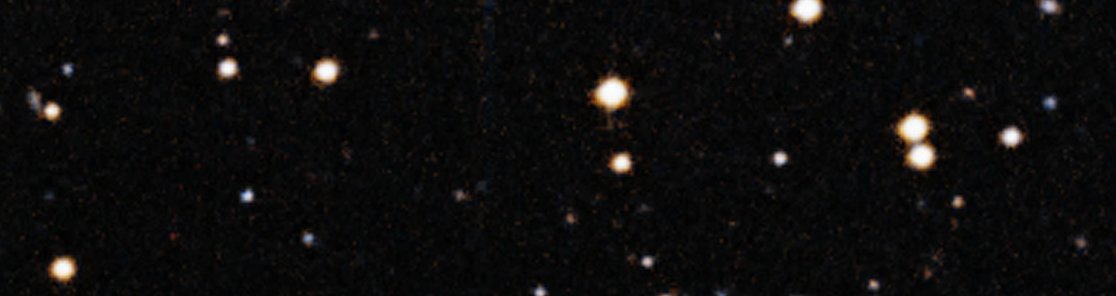
- The number of stars in a photo of the nighttime sky
- The number of cells under a microscope, and the area of each
- The distance between two points on a map
ImageJ is image-processing software specially made for scientific measurements. It is free to download at imagej.nih.gov and has a large online wiki.
ImageJ excells in automating image quantification. For example, counting hundreds of stars in 10+ images of the nightime sky. Someone could do this manually, but the star count can be less biased and more accurate (not to mention less tedious!) when automated.
Experienced ImageJ users can skip ahead to automation with macros, extending macros to automate quantification of all images in a folder, or [to my example macros].
Easy example
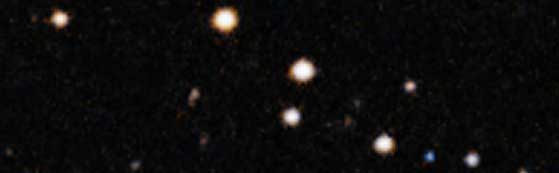
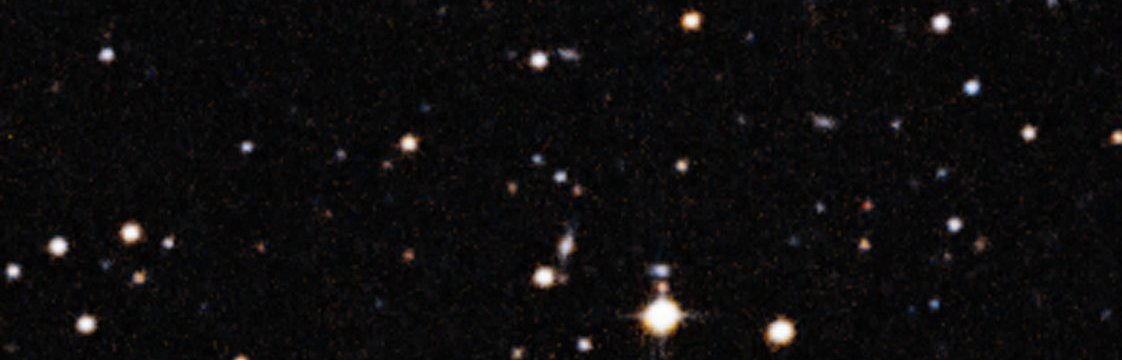
Let’s count the stars in an image of the nighttime sky:
- Save the image below to your device (see image credit below). File > Open.
- Edit > Options > Point tool. Use options: add to overlay and label points.
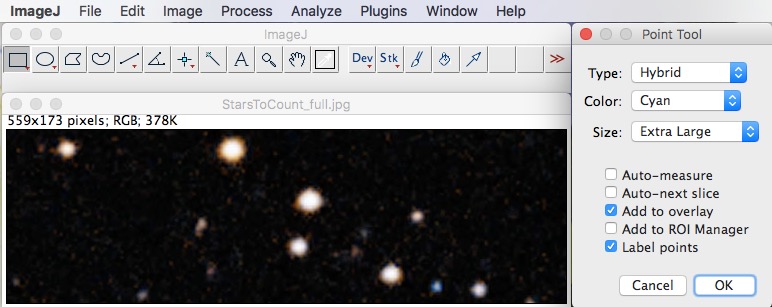
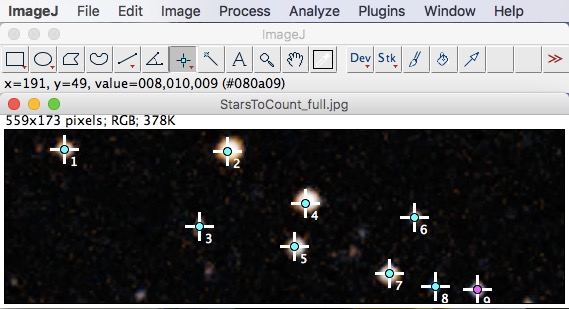
- From the toolbar, select the Point tool. Click on each star to be counted. If you make a mistake, click on the unwanted point and press *delete*.
Removing bias in quantification through thresholding
In the star counting example, someone might count more than 9 stars. Or fewer. The person counting brings a certain bias as to what a star should look like. To remove bias, let’s define exactly what a star looks like. That way, different people analyzing this image will arrive at the same star count. Here’s how:
- File > Open. Open the original image.
- Image > Type > 8 bit. Reduce the color profile to 8-bit.
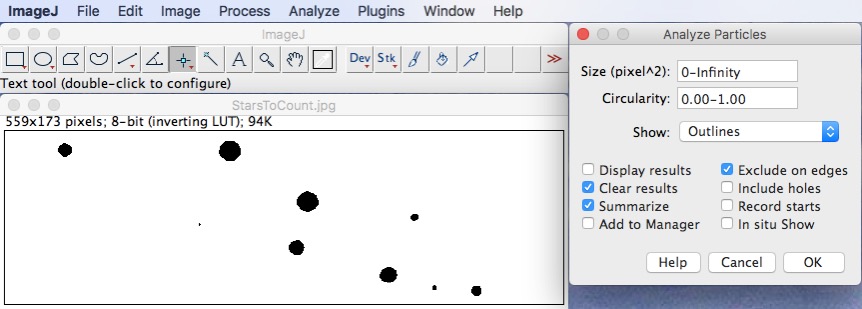
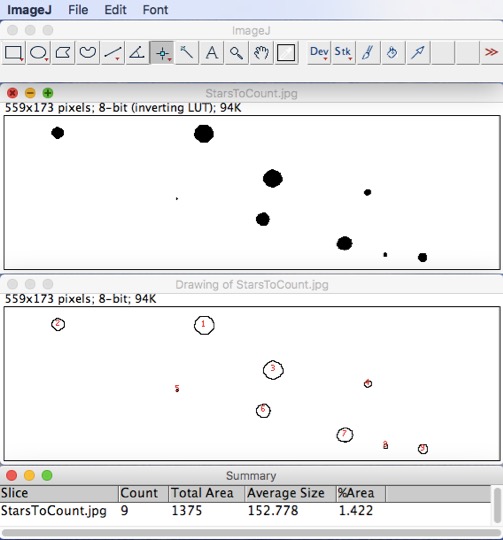
- Image > Adjust > Threshold > Apply. Use Threshold options: Intermodes, Red, and Dark background. Intermodes is one of many mathematical models for automated thresholding; it is the best option for this particular image.
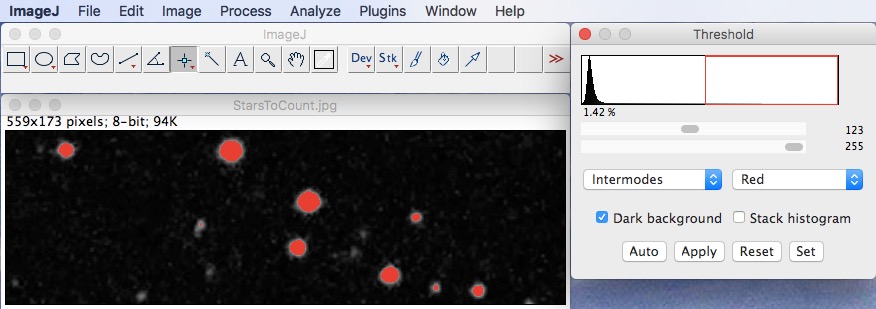
- Analyze > Analyze particles > OK. Use Analyze particles options: Show outlines, Clear results, Summarize, and Exclude on edges.
Nine stars are counted.
Automated quantification with macros
With thresholding, counting 100 stars is as easy as counding 9 stars. However, threshold counting stars in dozens of images would be tedious because of the need to click through the menus. ImageJ macros can automate the click through. Let’s make a macro to count the stars:
- File > Open. Open the original image.
- Open the Macro recorder. Edit the name of the macro, ex. "CountStars.ijm" (Note- .ijm is the ImageJ Macro extension).
- Click through all the steps for threshold counting. The steps will be recorded.
- Image > Type > 8 bit
- Image > Adjust > Threshold > Apply. Use Threshold options: Intermodes, Red, and Dark background.
- Analyze > Analyze particles > OK. Use Analyze particles options: Show outlines, Clear results, Summarize, and Exclude on edges.

- In the recoder window, click *create*. A new .ijm window will open. Save the macro to the ImageJ > macros folder.
- Close all windows.
- File > Open. Open the original image.
- Plugins > Macros > Open. Open CountStars.ijm.
- Click on the .ijm window. New menu options will appear. Macros > Run macro. Nine stars are counted, just as if the menus were clicked through by hand.
- Test the macro on another star image.
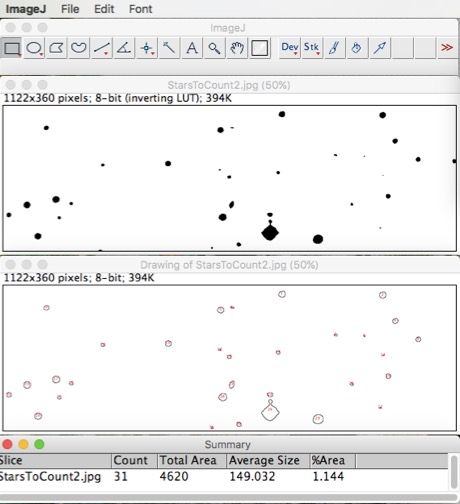
- File > Open. Open the second image (use the one below).
- Plugins > Macros > Open. Open CountStars.ijm.
- Click on the .ijm window. Macros > Run macro. Thirty two stars are counted.
- File > Open. Open the second image (use the one below).
Extending macros to automate quantification of all images in a folder
If you have hundreds of images to process, the clicks required to open and close each image become tedious. Adding a few lines to a macro can automate opening each image, running the macro, saving the results, and closing each image. Here’s how:
- Download the third example star image, below. Save all of three example images (StarsToCount 1, 2, and 3) into one folder. Put nothing else in this folder.
- In ImageJ, Plugins > Macros > Edit. Open CountStars.ijm.
- File > Save As. Save the macro as "CountStarsInFolder.ijm"
- Add the following text to the macro (or copy-past from a [PDF](https://LeighHenderson.github.io/assets/ImageJ-MACRO-CountStarsInFolder.pdf) of the finished macro):
- Before the rest of the text in the macro window, add instructions to choose an input folder and an output folder (folders are called "directories" in ImageJ): dirInput = getDirectory("Choose Directory "); dirOutput = getDirectory("Choose Directory ");
- Add instructions to process each image, or "file," in the folder:
list = getFileList(dirInput); setBatchMode(true); for (i=0;i<list.length;i++) { open(dirInput+ list[i]); } - At the end of the macro, add instructions to save the thresholded image and close the open windows. saveAs("Jpeg", dirOutput + File.nameWithoutExtension + "_Threshold"); close(); }
- File > Save.
- Macros > Run macro.
- A dialogue box will open. Select the folder in which your images are stored.
- A second dialogue box will open. Select a different folder in which thresholded images will be placed. Do not make a new folder inside the folder from step 7.
- The macro will run. Star counts will appear in the Summary window (9, 32, and 19 stars in images 1, 2, and 3, respectively). Thresholded images will appear in the folder selected.
Editing macros
Edit the contents of “CountStarsInFolder.ijm” to improve the accuracy of counting, or completely rework the contents to perform your own image quantification tasks.
-
On the accuracy front, you may have noticed that there is a mistake made on “StarsToCount2.jpg”: two stars appear so close together that they are counted as one. This type of error can be dealt with by adding a watershed step (LINK TO PAGE).
-
On your own star images, you may notice that the stars aren’t counted properly. You’ll find the problem by examining the saved thresholded images: thresholding is failing. Thresholding takes the overall brightness and contrast of an image into account. Therefore, pictures taken with differet settings or at different times/locations often require different thresholds. Consider chaning the threshold to the one that works best for your images. Note that using different thresholds on images in a set can alter count results; controlling for camera settings and time/location in batches of images is the best way to avoid threshold bias.
-
Test the star counting macro on images of other objects to be counted. For example, try counting cell nuclei that have been stained with DAPI. As discussed above, the threshold may need to be changed.
-
Set a scale for the image and then report the area of each star. See my ImageJ protocols for an example.
The sky’s the limit on macros [pun intended]. To infinity and beyond!
See my ImageJ protocols for quantifying lipid droplets for inspriation.
Starry sky image credit
Thanks to Davide De Martin for the starry sky image from the ESO/Digitized Sky Survey 2. All smaller sky images were cropped from the original.